If you're wanting to make diapers, wetbags, or even snack bags with PUL, you may find that it can be a very sticky hassle to work with. Some people get a walking foot or a teflon foot, but I have never found it necessary to invest in either of those tools. Here are a few tips I DO use for sewing with PUL:
ONE ~ turn it over
Put the sticky side down. If you're working with two fabrics (say, PUL and flannel, as when making a diaper) then just sew all your seams with the flannel against the presser foot, and the sticky-side-down. Basically what this does is that it puts the feed dogs on the sticky side, so they push it on through (and it doesn't have to slide because it is 'walked' by the feed dogs).
TWO ~ force it through
If you are sewing PUL to PUL (as with a wetbag) then you can't just leave the PUL on the bottom. You can just force your fabric through (I grab it from the back and pull). Usually this gives uneven stitching (usually very small stitches since the fabric doesn't want to slide along the foot), and may push one layer of fabric off of the alignment with the other one, leading to the need to unpick (and remember the tiny stitches?!) Yeah, there is potential for much ugly here. It can really make a mess as you're figuring it out, so definitely do a few test runs. However it can be done. Admittedly, this is usually the method I use when making wetbags. (I french seam my wetbags, so I sew with the sticky to the inside first (which makes a nice normal seam, and secures the layers together so that nothing will slip around) and then I turn it inside out and do the second step of the seam with the 'force it through' method.
THREE ~ use a tissue
This is slightly more labor intensive, but is a very easy way to avoid all the problems of the 'force it through' method when you have to have the sticky side up.
First you'll need some kind of light paper. Tissue paper (as in the present-wrapping kind) can be used, or kleenex, or toilet paper... if it's a thicker one then separate the layers so you have nice thin one-ply paper (ideally it's nice to be able to see through it a little).
Do not try to do this with paper paper. It's too thick.
 |
| It's best to align the tissue so that it covers where the seam will be, but NOT the edge of the fabric--that way you can still follow the lines to keep your seam allowance even. |
 |
| Sew right through tissue and fabric |
 |
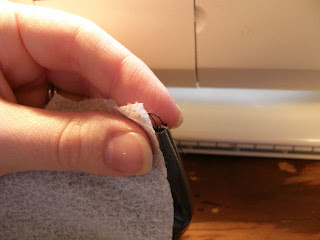
| Gently pull away the tissue--it will rip right along the seam |
 |
| Use a fingernail to scrape the little stuck bits of tissue out of the stitches. If tiny particles remain, they will wash out. |


What works for me is to put a drop of machine oil on the underside of my pressor foot. It lets the foot glide along the pul without me having to pull it and knock it off alignment
ReplyDeleteI have found that wax paper works THE BEST. It's easier to handle than tissue. You can precut it in 1/2" strips and when you're done it tears off along the seam because it's been perforated by the needle. It's also pretty easy to see through.
ReplyDelete