Friday, May 6, 2011

Sleeved Bib made from 2 Washcloths

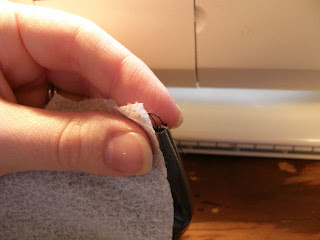
If your kids are anything like mine, they take great joy in taking off their bibs... The solution? A bib with sleeves that they can't take off!
My sister in law had a few of these and I always thought they were cool, so I picked up some dishcloths on sale and started playing around until I figured out what I was doing.

(bib is modeled on a child of about 12m and 22lbs...they still fit him fine at 18m and 25lbs, although they do not fit my 4yo who is 40lbs...just for reference)

Materials:
  • 2 washcloths (or one hand towel cut in half could do) (I found washcloths in pairs at the dollar store) From here on in, I'll refer to the sleeves washcloth as 'stripe' and the bib front washcloth as 'red.'
  • Some bias tape or cotton ribbing, at least 24" long. I cut a 1 1/2 inch strip off the bottom of a t-shirt, and didn't worry about ironing it into proper bias tape, but just rolled/sewed it down. If you're not experienced with bias tape, then using the real stuff will probably be easier. Make sure it's fat, as the washcloths can be a bit bulky.
 
1~ Cut the stripe washcloth in half from corner to corner. Many washcloths or dishcloths are not quite square--don't worry about that. It's a bib, not a wedding gown. ☺


2~ Take each of the triangles, and serge or hem across the long edge (this is the lower edge of the sleeve)

 3~ fold the sleeve in half, right side in, and sew across the corner, about 2 1/2 inches up from the tip. Cut off the pointy bit beyond the seam. Repeat with other sleeve.
Now you have the uncut red washcloth, and two sleeves.

 4~ Match up the  lower edge of each sleeve (the part where the corner got cut off) with a corner of the red bib front. Sew just the one side of each sleeve to the red washcloth. No need to finish any edges, because they are the edges of the washcloths, so they're already finished.

At this point, if your washcloth wasn't square, you will notice that one sleeve comes higher than the other. Don't worry about it. That happened on every bib I made. It doesn't matter, and it won't be noticeable in the final product.

5 ~ Cut across the corner of the red washcloth, from sleeve top to sleeve top


6 ~ Take the bias tape or ribbing, find the center, and match it with the center of your red washcloth (where you cut it off between the sleeves). Pin it first if you like, or just sew it on. Sew from the center outward on each side, with 1/4" or 3/8" seam allowance. Go over the sleeve seam and catching about 2" of the sleeve front in the tape, then have the tape go off the sleeve.

7a ~ (if you're using a strip of something rather than regular bias tape) Flip the bib over and fold the strip down in half so that the seam allowance and the strip meet in the middle.

7b ~ fold down the tape/strip onto the back of the bib, so that all raw edges are tucked inside. Sew along the edge of the tape, catching both front and back of it in the stitching. When you get out the sides (past the edge of the 2" of sleeve you caught before), then sew the tape to itself, creating a tie.


One of the great perks of using a washcloth as a bib? When the kiddo is done eating, use the bib to wipe up the tray/chair as well! That has proven to be really nice when we are away from home!

Monday, February 21, 2011

Sewing with PUL (a tutorial)

If you're wanting to make diapers, wetbags, or even snack bags with PUL, you may find that it can be a very sticky hassle to work with. Some people get a walking foot or a teflon foot, but I have never found it necessary to invest in either of those tools. Here are a few tips I DO use for sewing with PUL:

ONE ~ turn it over
Put the sticky side down. If you're working with two fabrics (say, PUL and flannel, as when making a diaper) then just sew all your seams with the flannel against the presser foot, and the sticky-side-down. Basically what this does is that it puts the feed dogs on the sticky side, so they push it on through (and it doesn't have to slide because it is 'walked' by the feed dogs).


TWO ~ force it through
If you are sewing PUL to PUL (as with a wetbag) then you can't just leave the PUL on the bottom. You can just force your fabric through (I grab it from the back and pull). Usually this gives uneven stitching (usually very small stitches since the fabric doesn't want to slide along the foot), and may push one layer of fabric off of the alignment with the other one, leading to the need to unpick (and remember the tiny stitches?!) Yeah, there is potential for much ugly here. It can really make a mess as you're figuring it out, so definitely do a few test runs. However it can be done. Admittedly, this is usually the method I use when making wetbags. (I french seam my wetbags, so I sew with the sticky to the inside first (which makes a nice normal seam, and secures the layers together so that nothing will slip around) and then I turn it inside out and do the second step of the seam with the 'force it through' method.

THREE ~ use a tissue
This is slightly more labor intensive, but is a very easy way to avoid all the problems of the 'force it through' method when you have to have the sticky side up.
First you'll need some kind of light paper. Tissue paper (as in the present-wrapping kind) can be used, or kleenex, or toilet paper... if it's a thicker one then separate the layers so you have nice thin one-ply paper (ideally it's nice to be able to see through it a little).
Do not try to do this with paper paper. It's too thick.
 
It's best to align the tissue so that it covers where the seam will be, but NOT the edge of the fabric--that way you can still follow the lines to keep your seam allowance even.

Sew right through tissue and fabric

Gently pull away the tissue--it will rip right along the seam

Use a fingernail to scrape the little stuck bits of tissue out of the stitches. If tiny particles remain, they will wash out.
Since this method only uses up the edge half inch or so of the tissue, you can get a LOT of seaming out of a single tissue. I usually use two (or the two halves of one) and just alternate along longer seams. 

Thursday, February 10, 2011

I'm Hiding I'm Hiding!

With three sons in the house, we have a lot of camo, so today's treasury is based on that.
(as always, photos link to the listings)


What better way to say "you can't see me" than to breastfeed with a bold camo print! (I ♥ this cover!)


No cloth-diapering houseful of boys would be complete without at least one camo diaper! (Too bad for you, I bought this one and my son is wearing it as I type...but there are others out there!)
 

How about a nice toasty fleece blanket, perfect for all ages?!

Booties...

Baby legwarmers...

and for the ones who aren't so little anymore...
A belt (do you think this would make my waistline disappear?!)

or the coolest backpack in the school!

Thursday, December 16, 2010

Orange Circles

A couple of years ago, Christmas found us living in the Alaskan bush, without any of our christmas tree ornaments. We made several things, among them orange circles. (You can see the homemade tree here.) They make nice tree ornaments, but where orange circles really hit their stride is as suncatchers! We like to hang them in the window around Winter Solstice.

This is just one orange, spread across a south-facing window
The process is very simple:
 Slice an orange (or more than one) across sideways. Discard the very top and bottom parts, since the sun won't shine though them. I made my slices about 1/4 inch thick. Avoid making any extra slits in the peel of the orange, as the peel is the only part that stays very strong, and if it's broken the whole thing may fall apart!
Lay out the oranges on a cookie sheet, baking stone, or pizza rack, and put them in the oven on low (200*F or lower) OR put them in a dehydrator.
Sprinkle them with cinnamon, cinnamon-sugar, cloves, or whatever spices strike your fancy (if desired--it will not change the look really, but will enhance the smell).
Dry them for a couple of hours--just check in on them every 20-30 min after the first hour and see if they look dried out yet.
Take a needle and thread, and poke through the orange flesh just inside the skin (you can catch the white membrane, or just go through the orange pips near the edge), and make a loop of thread. I use a double thread, so the final loop is actually 4 strands.
Use short loops to hang them on the tree, or longer ones to hang in a window... I just use thumbtacks to pin the thread loops to the window frame.
Enjoy!


Of course, it's only fair to mention that if you have little ones (my son is 1), they may steal from you while you're working, and put the orange to a more traditional use...

Sunday, November 28, 2010

Cloth Advent Chain Tutorial

It started with this idea, but I adapted it and did it my own way.


Materials needed:
around a yard of fabric, (or half yard of each of two fabrics), or lots of scraps.
velcro or snaps for closures
interfacing (optional, but better with it)

Skills needed: 
cutting a straight line
sewing a straight line


1--Choose your fabrics. I used lots of leftover scraps, so I just divided them into 'reds' and 'greens' however you can do something more than that if you like. If you celebrate St Nicholas Day on Dec 6, then find a fabric that fits (Santa, an angel, religious symbol, etc). If you observe Solstice, perhaps choose a fabric with sunshines. If any of your family members have birthdays during December, make a birthday fabric ring. Our wedding anniversary is in December, so next year I plan to put in a fabric with hearts for that day (I didn't think of it early enough to get it done for this year). I also made a few extra links of an autumnal fabric, which I can use for the last few days of November (since we like to start our Christmas countdown right after Thanksgiving.

2--Cut out the rings. I used the extremely elaborate pattern of an envelope. A regular, legal-size (4x9") envelope. For the 25 days of December, you'll need 12 of one color and 13 of the other color (plus any November links you want, and minus any special other day links you want).

3-- If you want the rings to look nice and crisp, iron on (or sew on) interfacing to the wrong (back) side each piece at this point. I didn't do it because I was building these with a "use what is on hand" mentality, but they would look nicer if I'd done the interfacing.
(Press over seam allowances if desired--see note at step 6)

4--Fold each piece in half lengthwise, right sides together, and sew the ends closed. Use about 1/4" seam allowance (the edge of the presser foot) and then you won't have to trim them. Be sure to backtack at the fabric edges. I recommend just sewing one right after the other, without breaking the thread between. It saves thread, but it also is a lot less work than doing each one separately.


5--Cut apart all the links. Trim the corners of the seam allowances on the folded side of the fabric (no need on the open side). If you don't do interfacing, you can get away with skipping the trimming.


6--Turn each piece right-side-out. Tuck in the raw edges, and topstitch the link closed along that side (again I recommend sewing one after the other, without breaking thread between. You may want to use different colors of thread for different colors of fabric, as this topstitching will show.
Note ~ If you're a somewhat experienced sewer, you can just freehand this. If you're nervous about keeping even-sized seams though, you can iron the seam allowances over back between steps 3 and 4.


So here are a whole bunch of links. If you're smart, you'll iron them at this point. Lazy me didn't...but I should have...


7--Attach the closures. The tutorial I linked at the beginning demonstrates velcro, I used snaps because I have a snap press (or you could handsew snaps or buttons). The type of closure can be whatever you like, the important thing is to remember to make sure that the two sides are faced opposite directions, so that they will meet up in a pretty loop.
8--The next thing to do is get them in order. If you just have one fabric, or two that are alternating, then the ordering is simple. If you are putting in special links, or if you're using scraps like I did, then you'll want to lay out your links and figure out the order.


9--You can put numbers on them if you like. This tutorial for a more traditional advent calender has directions for making nice embroidered numbers. You can also use a fabric pen, applique on the numbers, or leave the chain without numbers. I opted to make little tags, which I can hang to the inside or outside.


Happy Counting! 
(and when the baby yanks on this chain, it doesn't break!)

Sunday, August 22, 2010

Banana Bottoms on Etsy

Kristen of Banana Bottoms is a fellow member of the Etsy Cloth Diaper Team, and she asked if I'd be willing to do a review and host a giveaway for her. (Official disclaimer, I did get a free diaper out of it.) I jumped at the chance because I traded her for another diaper a few months ago, and it's a great diaper. ☺


My favorite things about Banana Bottoms diapers:
♥ They are very trim. The photos should give you some idea of this.
♥ The double-layer snap-in doubler is nice and trim, but gives a LOT of absorbency. These are trust-them-for-naps-and-overnights kinds of diapers. That's a rare thing to find in a diaper this trim!

♥ Cuteness factor, of course--lots of cute prints!
♥ Comfort factor--all the diapers have bamboo velour inside (which is just astoundingly soft). I also love that every diaper is turned and topstiched--no serged edges to rub or irritate (this is how I make my own diapers, if that gives you an idea of how much superior I think it is).
♥ One of my favorite features is that the snap placement is closer than on most diapers I've seen--3/4 inch rather than 1inch apart). This gives greater adjustability than the wider placements do. Also the first snap on the wing is right at the edge--no wasted space there.
♥ A second thing about the snap placement is the way she does her crossover snaps--the wing snaps are double spaced (so they snap down with one 'empty' snap socket between them) and that means that they overlap smoothly. I'd only seen this once before and I LOVE it.

In fairness, I will mention the one downside (and it only applies to those in the USA) and that is that Banana Bottoms is based in Canada, so the shipping time can be a little slow because of customs. I think the wait is worth it though. ♥ ☺


Now for the GIVEAWAY!!!
It's being hosted over on my main blog--open Aug 23-29, go here to enter!!

Monday, August 2, 2010

Don't miss it...

The giveaway over at EtsyClothDiapers is almost over...just two days left. If you haven't been over to make your entries then hurry up!

Since the mandatory entry was to visit the shop and name a favorite item, I thought that people's comments would give me an idea of what people liked best--and what I should make more of. Well, I've read them, and what I am finding is that everybody likes something different. I'm pretty sure that every single diaper in my shop has been mentioned at least once. My one-of-a-kind designer diapers do seem to get more mentions than the others, and interestingly enough my biohazard diaper has gotten several mentions (I consider this interesting because I actually made it over a year ago, and have had it as a featured item in my shop for much of that time, but in spite of over 400 views it has not sold.)


In any case, the designer fitted diapers seem popular, so I will get busy and finish up the two I have in progress. ☺

Related Posts Plugin for WordPress, Blogger...